
In most types of weaving, advancing the warp is not physically difficult. I may sometimes find it an annoying interruption, but it’s not really a problem. However, I’ve found that with peg loom weaving, it can be a bit difficult.
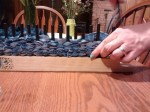
There’s not much written out there on peg and stick weaving, so it’s hard to pin down whether or not there’s a “usually recommended” method. But here’s the method of warp advancement in the few videos I’ve seen out there: pull up each peg, one by one, and replace it in its hole (click for big).
-

- 1, The warp is ready to be advanced.
-
- 2. Pulling up one peg at a time.
-
- 3. One peg is pulled out. The warp has been pulled through the whole weaving by a three inches or so and you can see the bottom of the peg at the top of the picture (my hand is holding it, just out of the picture).
-
- 4. The peg is now placed back into its hole.
The problem with this is that with a large piece, or a heavy weft, or a grippy warp, or a piece where the warp is quite thick, it can be difficult to pull the peg out. My denim rug ticks all those boxes. All I have to hold onto is an inch or two at the top of each peg, and doing this over and over can start to get tiring for the muscles of your forearms. If you have any inclination to hand, wrist, forearm, or elbow pain, it may crop up now — at least it does for me. (This is one reason it’s very nice to have longer pegs – more area for gripping and pulling, and less frequent advancement. The ones I am using here are only about 4.25″ long, and I sort of wish I had ordered 6″ instead. Lesson learned.)
Now, I’m no physical therapist, but here’s a method of warp advancement that I’ve found to be easier on my body; you just have to be more careful not to let the weft slide off the pegs as you work:

This view is from the back of the work; the weaving is over a foot long and is on the other side. First, I carefully lift several pegs just barely out of the base. No need to pull the warp through just yet.

Second: Here are four pegs lifted out and just sort of flopping there.
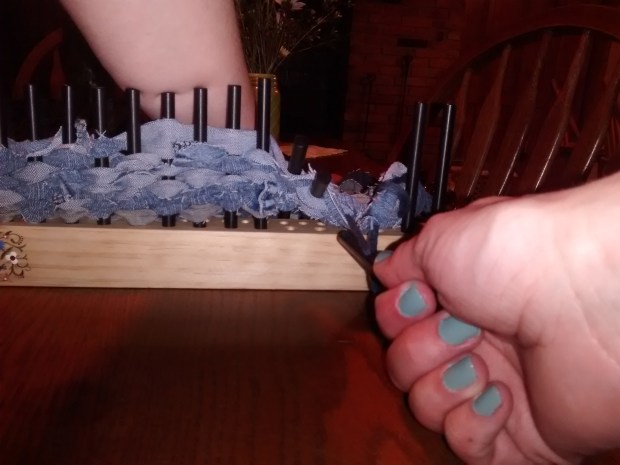
Third: I now use my left hand to push down on the weaving to hold it in place. This gives me a lot more leverage as I pull each warp through the entire weaving, holding the peg horizontally. Once I pull each peg, I replace them in the base, being careful to put them in the right holes.
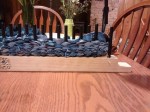
Either way you do it, once you’ve pulled each warp thread through the weaving and replaced all your pegs, the loom will look like this:
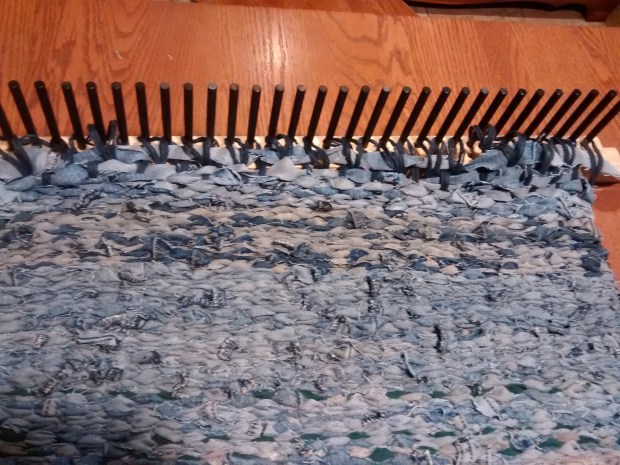
Kind of messy up top there, isn’t it? The next step is to tighten those loopy, floppy warps.
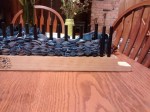
Tightening the warps is easy and satisfying:
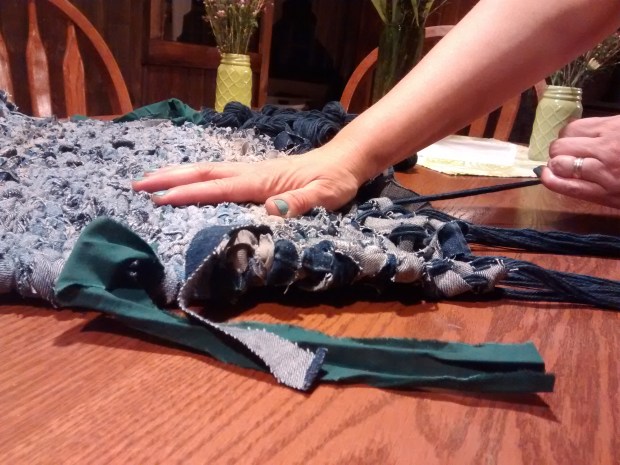
I’ve moved to the other end of my piece. Again, I use one hand to press down the weaving again to increase my leverage as I smoothly pull each warp snug.
Now that everything is tightened up nicely again, I like to hold it that way. To do that, I put clips at the bottom of the weft. Now everything is ready for more weaving onto the pegs.
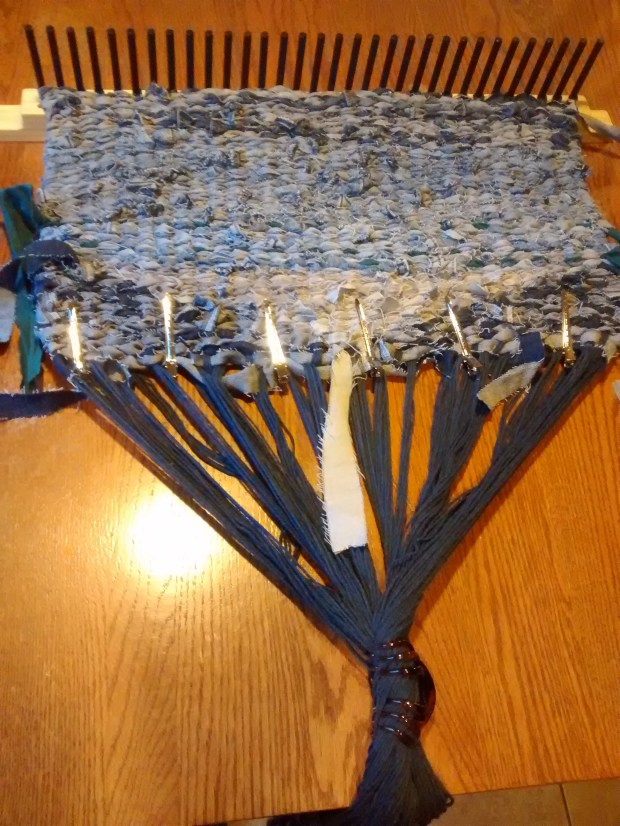
Hair clips, oh yes. They are useful. Luckily, they are inexpensive and easy to find, too.
