
So I have this great new peg loom (I got it from Daisy Hill Handiworks). I’ve woven a couple of practice pieces on it, getting a feel for the sett of the two different rows and the use of different materials, and last night I started a rug for my bathroom. It will be 24″ wide and 5 feet long, and so heavy because it is made of a bunch of jeans I’ve been keeping over the last few years.
First up: the warp. I am using six strands of Sugar ‘n Cream cotton yarn for each peg, so it’s pretty hefty. I have a plan for finishing the ends of the warp that will leave it visible in the final rug, so I got the color “Indigo” to coordinate. For my practice projects I was much less careful about warp, but here, it matters. Whatever your project needs, make sure your warp is strong, relatively smooth, and thick. A thick warp is better because if you have a thin warp (like say, I had just two strands of cotton yarn instead of six), the weft will collapse when you slide it from the pegs onto the warp. This here is a rug! I don’t need any drape, and I definitely don’t want the weft to be loose later and looking for ways to get into trouble, so a thick warp it is.
I needed three strands of the cotton yarn 16 feet long for each of my 32 pegs (each 16 foot strand got folded in half, yielding the six-strand thickness for each peg by the time all was said and done.) I usually don’t work with such long lengths individually like that and I don’t have a warping board or reel. Turns out, the peg loom itself works pretty well along with my one warping peg and my random little Pompon rug loom I have kicking around. (Thanks for the idea, Noreen.)
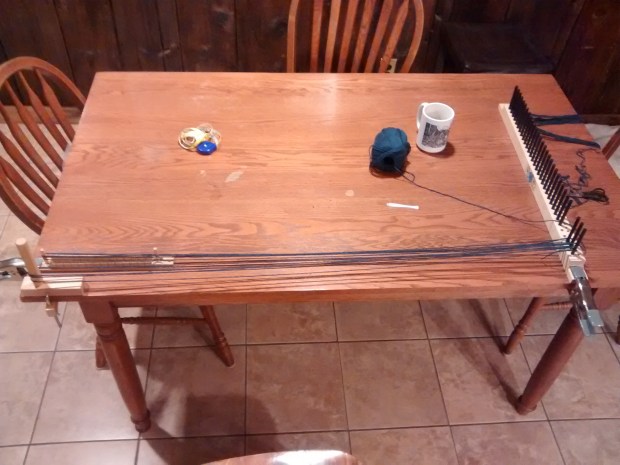
Here’s my warping set up, winding in progress.
Because I had such a great, long, thick warp and one of my warping pegs was weensy, I wound enough warp for ONE peg (that’s what you see in the image above), then cut it, threaded the peg, straightened it out, tied the ends, and then measured the warp for the next peg. After every 5-6 pegs were done I bundled and chained the warp to keep things tidy (and to lessen the temptation the kitten was suffering!) You can see that a few pegs at the top of the loom are already warped in this picture. I removed a couple of pegs near the bottom of the picture just to make it easier to wind the warp onto the last three pegs there at the bottom without nearby unused pegs getting in the way.
When I was done measuring the warp, I was also done warping the loom and everything was ready to go. It took me maybe two hours. I’d recommend this method if you plan to make a nice, thick warp of significant length.
